As a motorcycle enthusiast, I am always looking for ways to improve my bike’s performance and longevity. One aspect that often gets overlooked by many riders is the importance of properly adjusting a motorcycle chain. Over the years, I’ve realized that a well-adjusted motorcycle chain can significantly enhance the bike’s performance, while a poorly adjusted chain can lead to many problems.
The process of adjusting a motorcycle chain may seem daunting to beginners, but it’s actually a straightforward task that can be mastered with patience and practice. In this article, I will share my knowledge and experience on how to perfectly adjust a motorcycle chain, providing essential tips and tricks along the way.
It’s important to remember that every motorcycle is different. Therefore, it’s essential to refer to your bike’s service manual for specific adjustment guidelines. However, the general principles I will discuss in this article are applicable to most motorcycles.
The Importance of Perfectly Adjusting a Motorcycle Chain
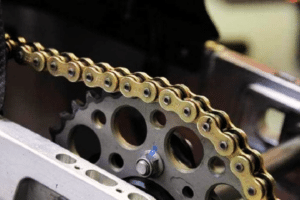
On the other hand, a poorly adjusted chain can lead to several problems. It can wear out faster, reduce the bike’s performance, and even damage other components, such as the sprockets and transmission. In the worst-case scenario, a loose or overly tight chain can snap while riding, leading to a dangerous situation.
Therefore, it’s crucial to regularly check and adjust your motorcycle chain, ensuring it’s in the best condition possible. This not only enhances your bike’s performance but also prolongs the lifespan of the chain and other related components.
Understanding the Basics of a Motorcycle Chain
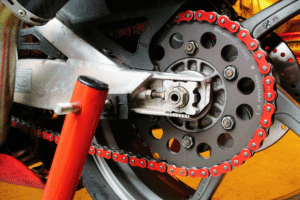
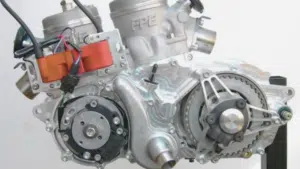
The chain wraps around the sprockets, which are toothed wheels connected to the engine’s output shaft and the rear wheel’s hub. As the engine runs, it turns the output shaft and the connected sprocket, which, in turn, moves the chain and spins the rear wheel.
The distance between the centers of the pins in the chain links is known as the pitch. The chain and sprockets must have the same pitch to ensure proper engagement. Additionally, the chain’s tension, or tightness, needs to be correctly adjusted to prevent slipping, excessive wear, or breakage.
Tools Needed for Motorcycle Chain Adjustment
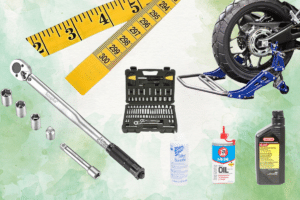
Adjusting a motorcycle chain requires a few basic tools, most of which you probably already have in your garage. Here’s what you’ll need:
- A motorcycle stand or lift: This tool is essential for lifting the rear wheel off the ground, making it easier to adjust the chain.
- A wrench and socket set: You’ll need these to loosen and tighten the axle nut and adjuster bolts.
- A ruler or tape measure: This is for measuring the chain’s slack or free play.
- A torque wrench: This tool is crucial for tightening the axle nut to the correct torque specification.
- Lubricant and cleaning supplies: These are necessary for cleaning and lubricating the chain before and after adjustment.
Remember that each motorcycle is different, so you may need additional tools depending on your bike’s design and specifications.
Step-by-Step Guide on How to Adjust a Motorcycle Chain
Now that we’ve covered the basics, let’s dive into the step-by-step process of adjusting a motorcycle chain.
Step 1: Place your motorcycle on a stand or lift to raise the rear wheel off the ground.
Step 2: Clean the chain using a quality chain cleaner and brush. This step is crucial as dirt and grime can affect the adjustment process.
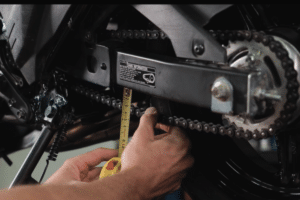
Step 3: Measure the chain’s slack or free play using a ruler or tape measure. You can find the recommended slack specification in your bike’s service manual.
Step 4: If the chain is too loose or tight, loosen the axle nut using a wrench. Then, adjust the chain tension by turning the adjuster bolts on both sides of the swingarm.
Step 5: Once you’ve achieved the correct chain tension, tighten the axle nut using a torque wrench. Be sure to follow the torque specification in your bike’s service manual.
Step 6: Finally, clean and lubricate the chain to reduce friction and prolong its lifespan.
Remember to always check the chain tension after a ride, as it can change due to the chain’s thermal expansion.
Essential Tips and Tricks for Perfect Motorcycle Chain Adjustment
Here are some essential tips and tricks I’ve gathered over the years to help you perfectly adjust your motorcycle chain:
- Always adjust the chain when it’s cold, as it expands when heated, which can affect the tension.
- Make sure the rear wheel is aligned properly after adjusting the chain. Misalignment can lead to uneven tire wear and affect the bike’s handling.
- Check the chain’s condition during adjustment. Look for signs of wear, such as cracked or worn-out links, and replace the chain if necessary.
- Always use a torque wrench to tighten the axle nut. Over-tightening can damage the axle or bearings, while under-tightening can cause the wheel to come loose.
- Remember to clean and lubricate the chain regularly, especially after riding in wet or dirty conditions. This not only helps maintain the correct tension but also prolongs the chain’s lifespan.
Common Mistakes to Avoid While Adjusting a Motorcycle Chain
While adjusting a motorcycle chain is a relatively straightforward task, there are a few common mistakes you should avoid:
- Not checking the chain tension regularly: Chain tension can change due to various factors, such as riding conditions and temperature changes. Therefore, it’s crucial to check it regularly and adjust as necessary.
- Adjusting the chain too tight: A chain that’s too tight can wear out quickly and put excessive strain on the engine and transmission. Always follow the slack specification in your bike’s service manual.
- Not cleaning and lubricating the chain: Dirt and grime can increase friction and accelerate chain wear. Therefore, always clean and lubricate the chain before and after adjustment.
- Not replacing a worn-out chain: A worn-out chain can snap unexpectedly, leading to a dangerous situation. If you notice any signs of wear during adjustment, replace the chain immediately.
Maintaining Your Motorcycle Chain Post Adjustment
- Clean and lubricate the chain regularly: This reduces friction, prevents rust and corrosion, and prolongs the chain’s lifespan.
- Check the chain tension regularly: As mentioned earlier, chain tension can change due to various factors. Therefore, make it a habit to check it regularly, especially before long rides.
- Inspect the chain for signs of wear: Look for signs such as cracked or worn-out links, rust, and excessive stretch. If you notice any of these signs, it’s time to replace the chain.
- Always use quality chain lube: Quality chain lube can significantly reduce friction and wear, prolonging the chain’s lifespan. Avoid using regular oil or WD-40 as they can attract dirt and grime.
When to Seek Professional Help for Motorcycle Chain Adjustment
While adjusting a motorcycle chain is a task that most riders can do at home, there are times when you should seek professional help:
- If you’re not confident in your ability to adjust the chain correctly.
- If the chain is excessively worn out or damaged.
- If the chain keeps getting loose or tight, despite regular adjustments.
- If you notice unusual noises or vibrations from the chain during rides.
In such cases, it’s best to take your bike to a professional mechanic to ensure the chain is correctly adjusted and in good condition.
Conclusion: Perfecting Motorcycle Chain Adjustment for Optimal Performance
Adjusting a motorcycle chain is an essential part of bike maintenance that can significantly improve your bike’s performance and longevity. It’s a task that requires patience and precision, but with practice, it can be mastered by anyone.
Remember, a well-adjusted motorcycle chain provides a smoother ride and better fuel efficiency and prolongs the lifespan of the chain and other related components. On the other hand, a poorly adjusted chain can lead to several problems, including reduced performance and potential damage to the bike.
By following the steps, tips, and tricks outlined in this article, you can perfectly adjust your motorcycle chain and enjoy a better, safer ride. And remember, when in doubt, don’t hesitate to seek professional help. Happy riding!

